Pixio
Pixio - Android App eCommerce Mobile App Template
This documentation is last updated on 03 October 2024.
Thank you for purchasing this Mobile App template.
If you like this template, Please support us by rating this template with 5 stars
Installation -
Android Studio Setup
1. Install Android Studio Koala | 2024.1.1 above
Download and install Android Studio from the official website. Follow the installation instructions to set up your development environment.
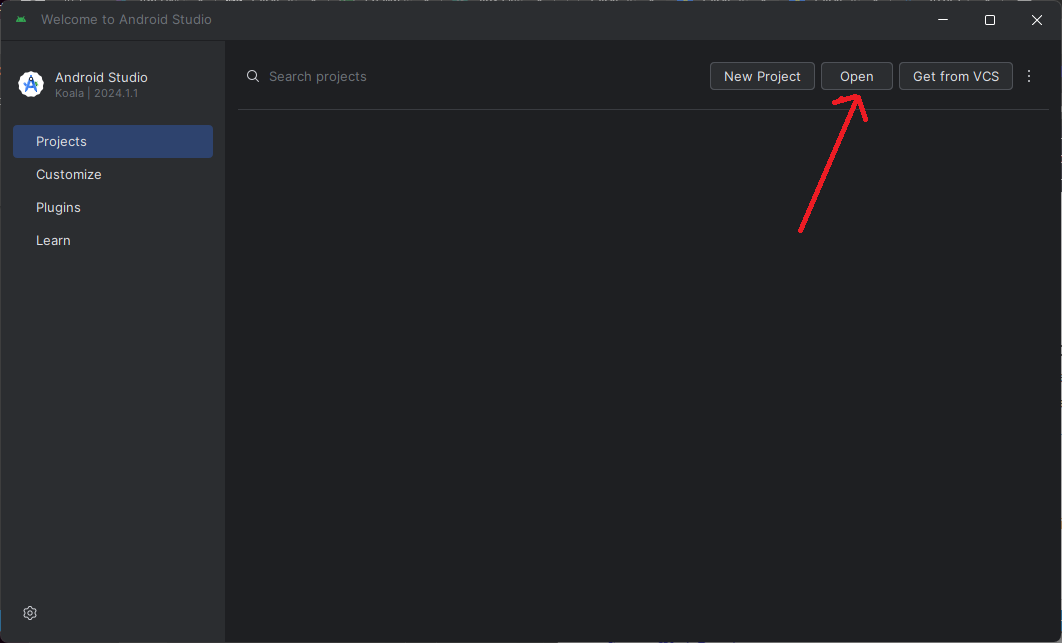
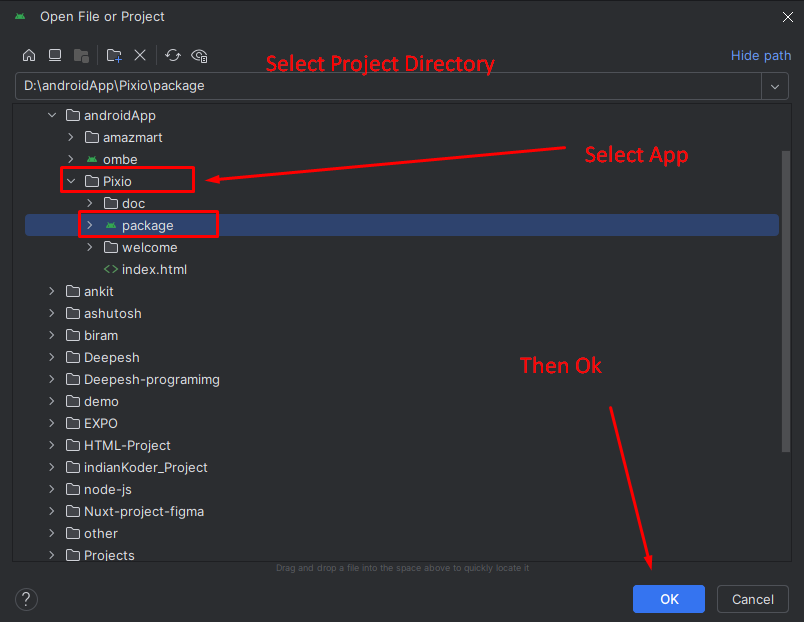
2. Import the Project
Open Android Studio and select File > Open. Navigate to the
project directory and open the Pixio folder. Android Studio will handle the
import process and sync the project.
3. Sync Gradle
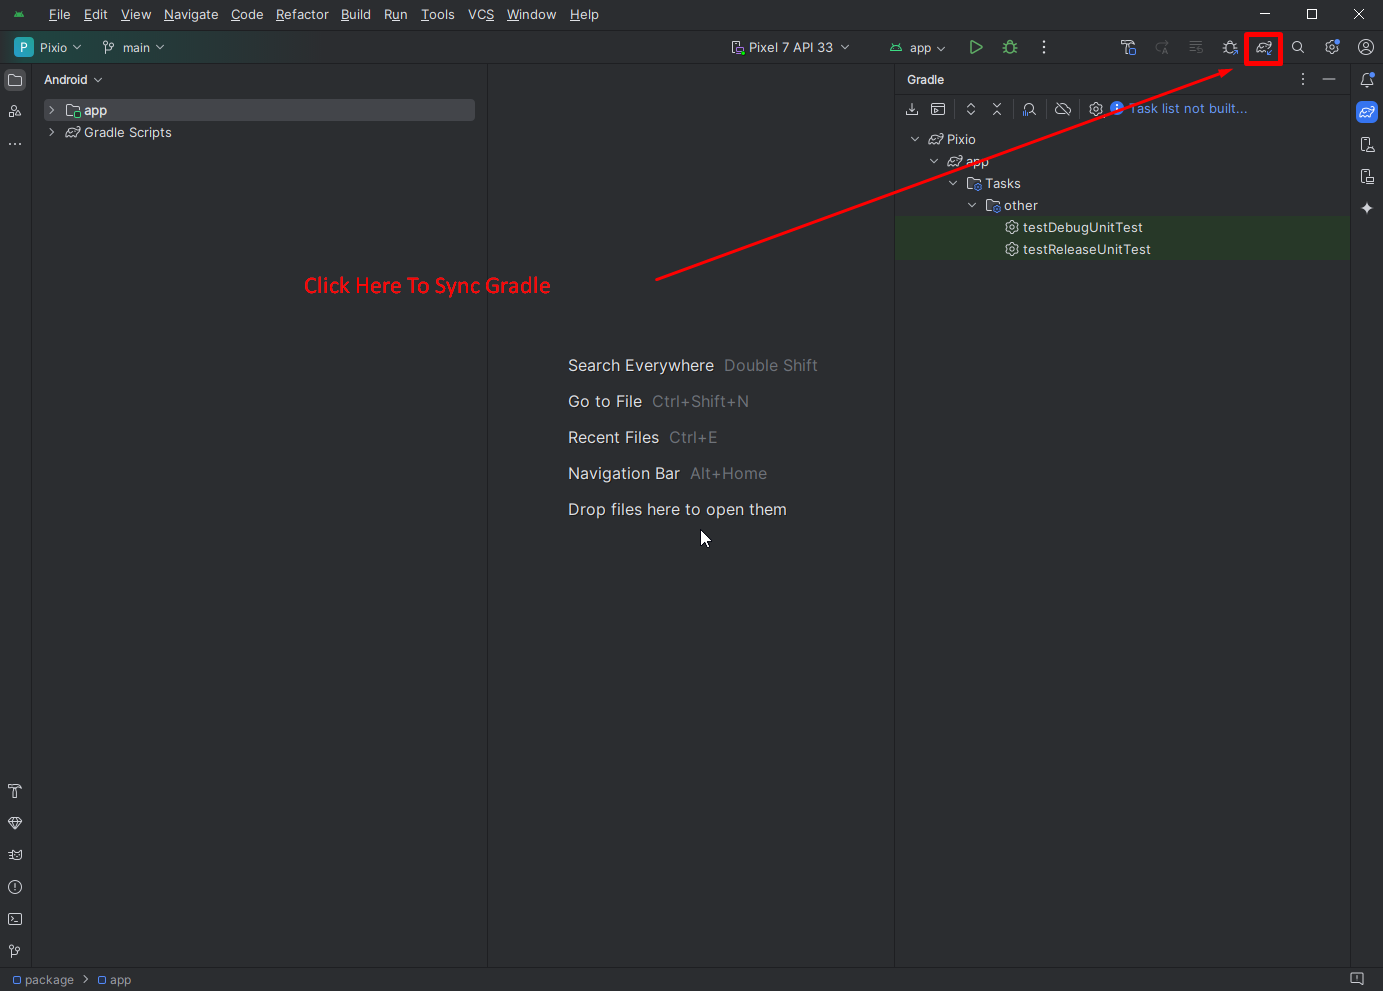
CTRL + SHIFT + O
4. Configure Emulator or Device
Set up an Android Virtual Device (AVD) or connect a physical device to test the application. Follow Android Studio’s instructions to configure the emulator or device.
5. Build and Run
Click on the Run button in Android Studio to build and run the Pixio app on the emulator or connected device.
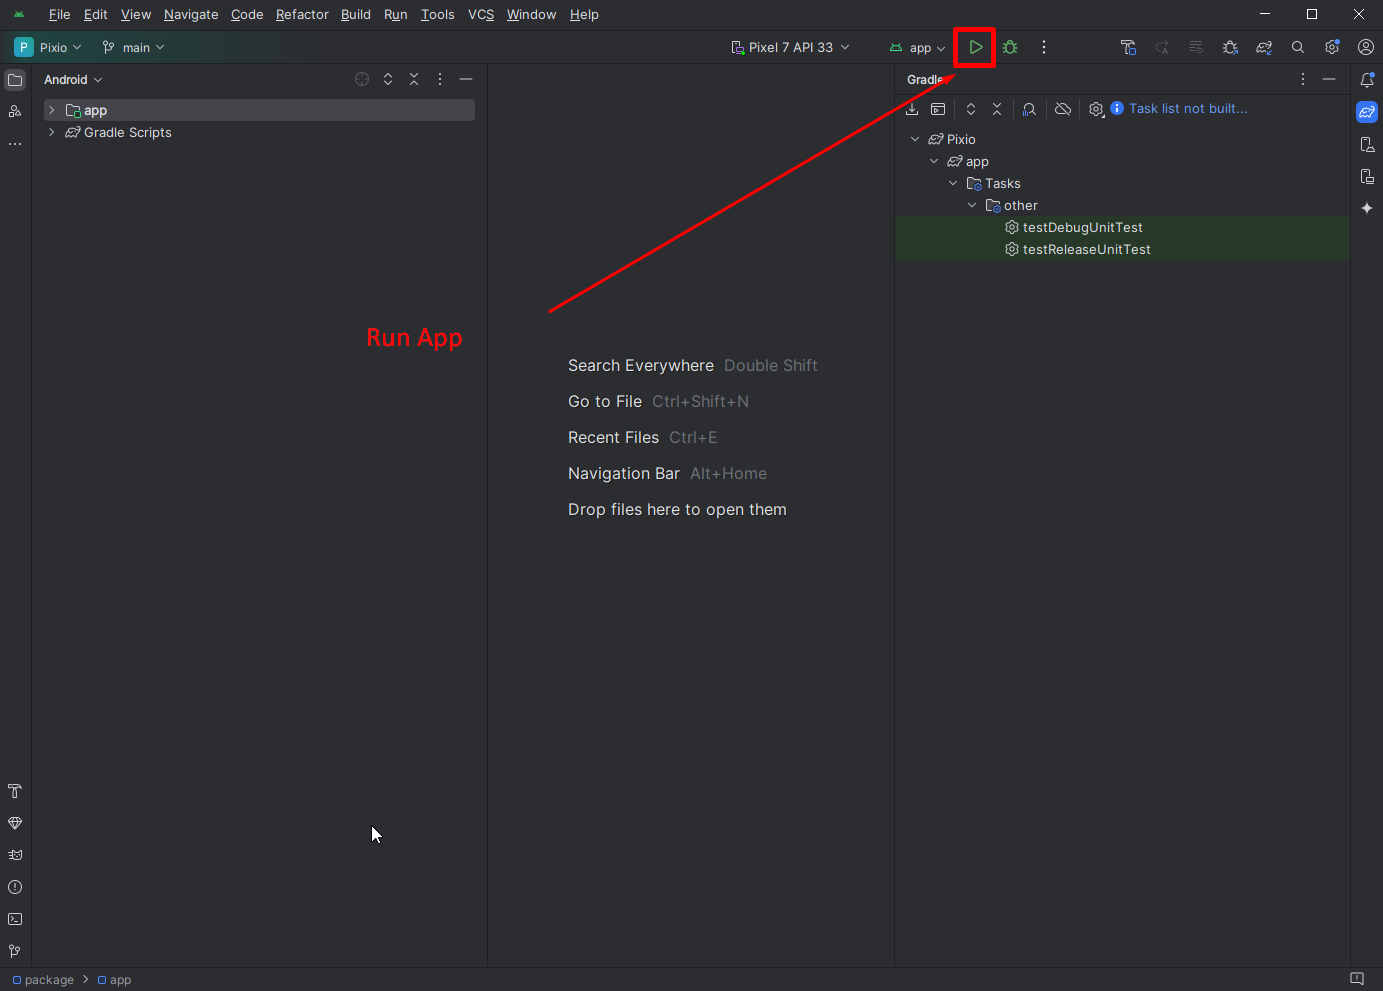
SHIFT + F10
Folder Directories -
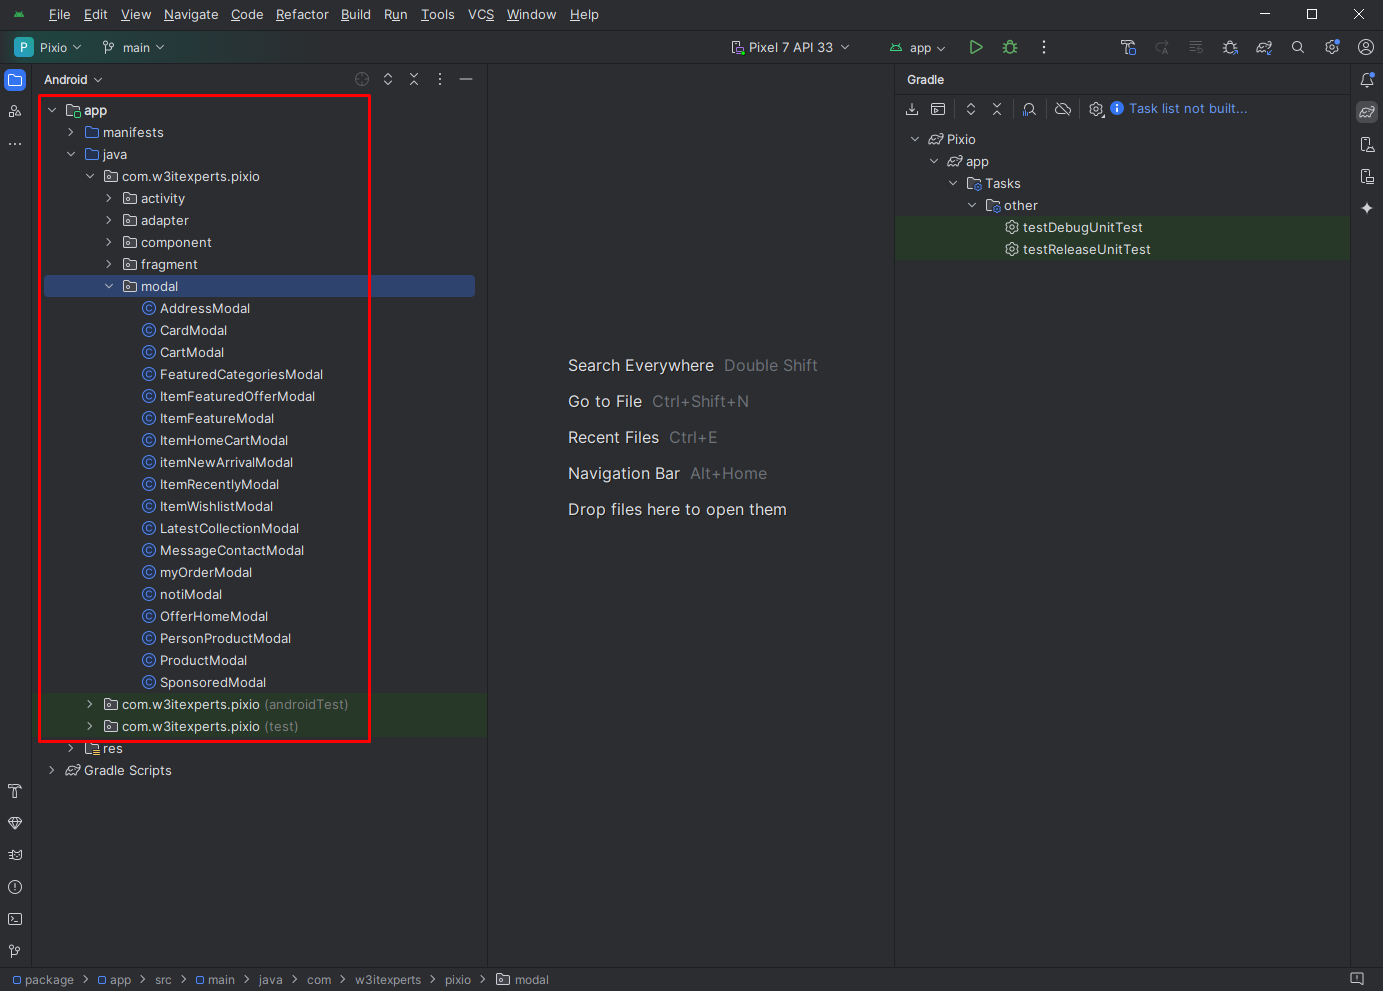
Source Structure -
The Pixio app is structured as follows:
app
Contains the main application code.
components
Reusable UI components and their styles.
constants
Constant values and configurations.
layout
Layout files and resource directories.
Navigations
Navigation configurations and setup.
screens
Various screen definitions and UI logic.
Theme -
1. Theme Configuration
The Pixio app uses a default theme, which can be customized through the
styles.xml file located in app/src/main/res/values. Modify the colors,
fonts, and other theme attributes as needed.
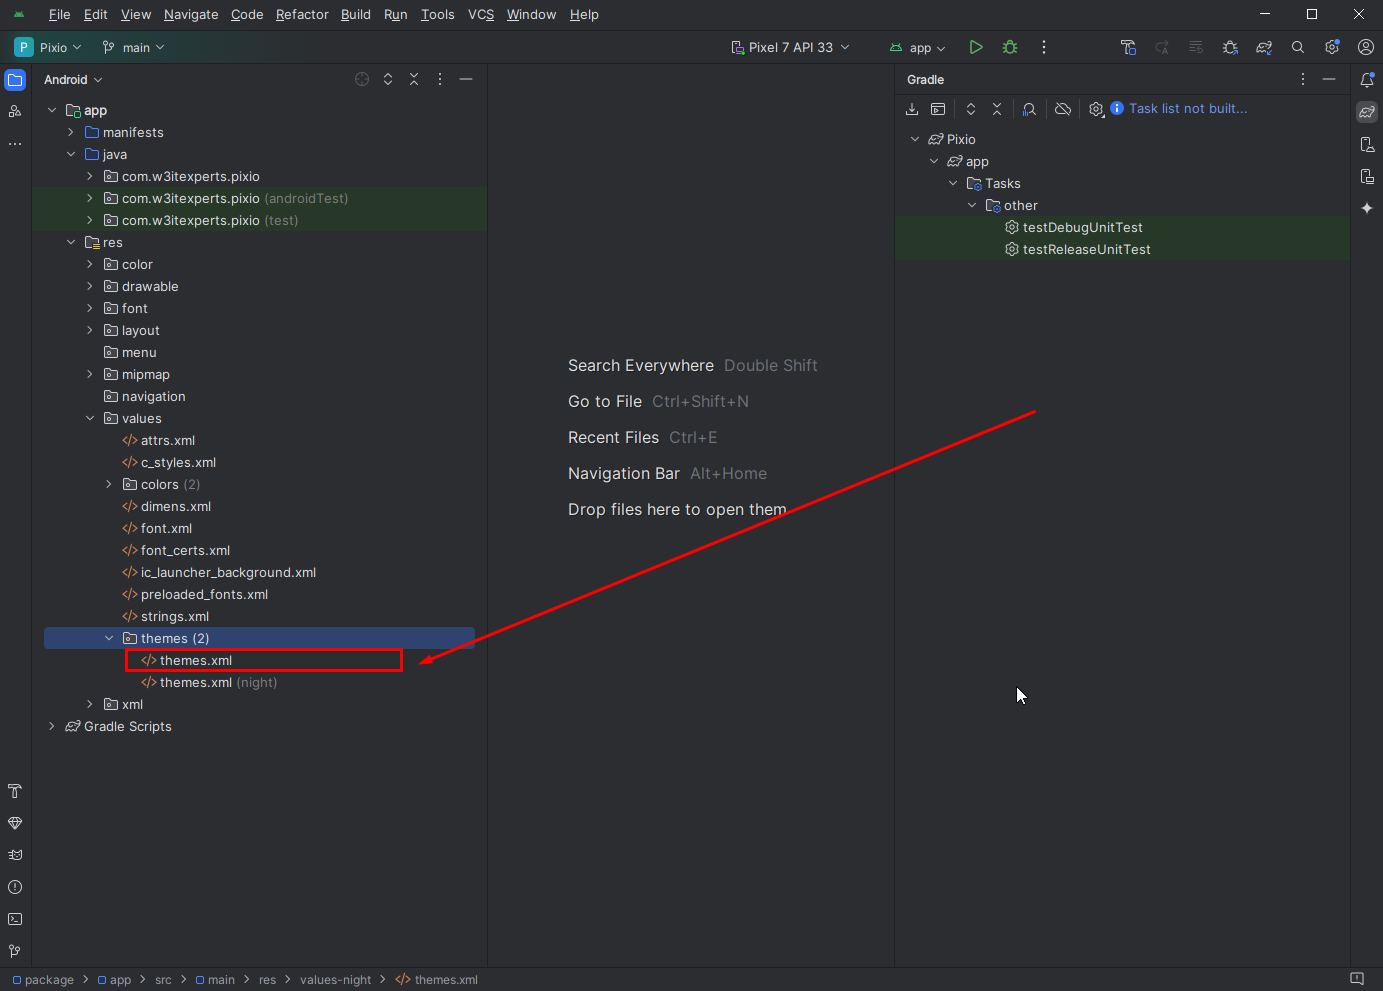
2. Custom Themes
To create a custom theme, define a new style in the styles.xml file and apply it to
your activities or components.
App Name & Icon -
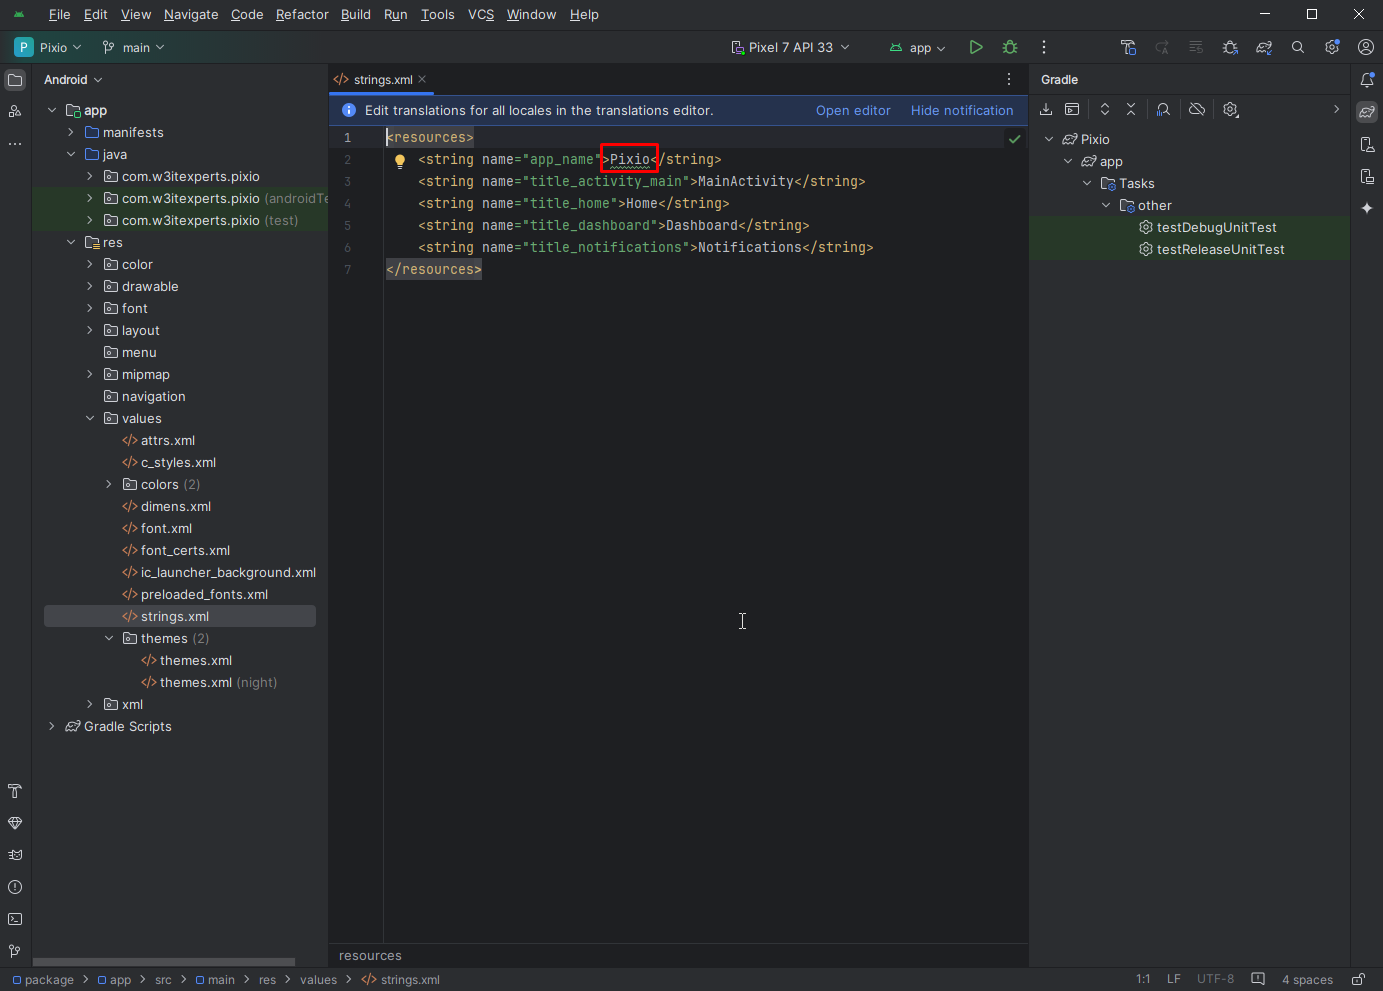
1. Changing the App Name
To change the app name, modify the strings.xml file located in
app/src/main/res/values. Look for the app_name string and update it as
needed.
2. Changing the App Icon
To change the app icon, replace the existing icon files in the res/mipmap
directories. You should provide different icon sizes for various screen densities.
Package Name -
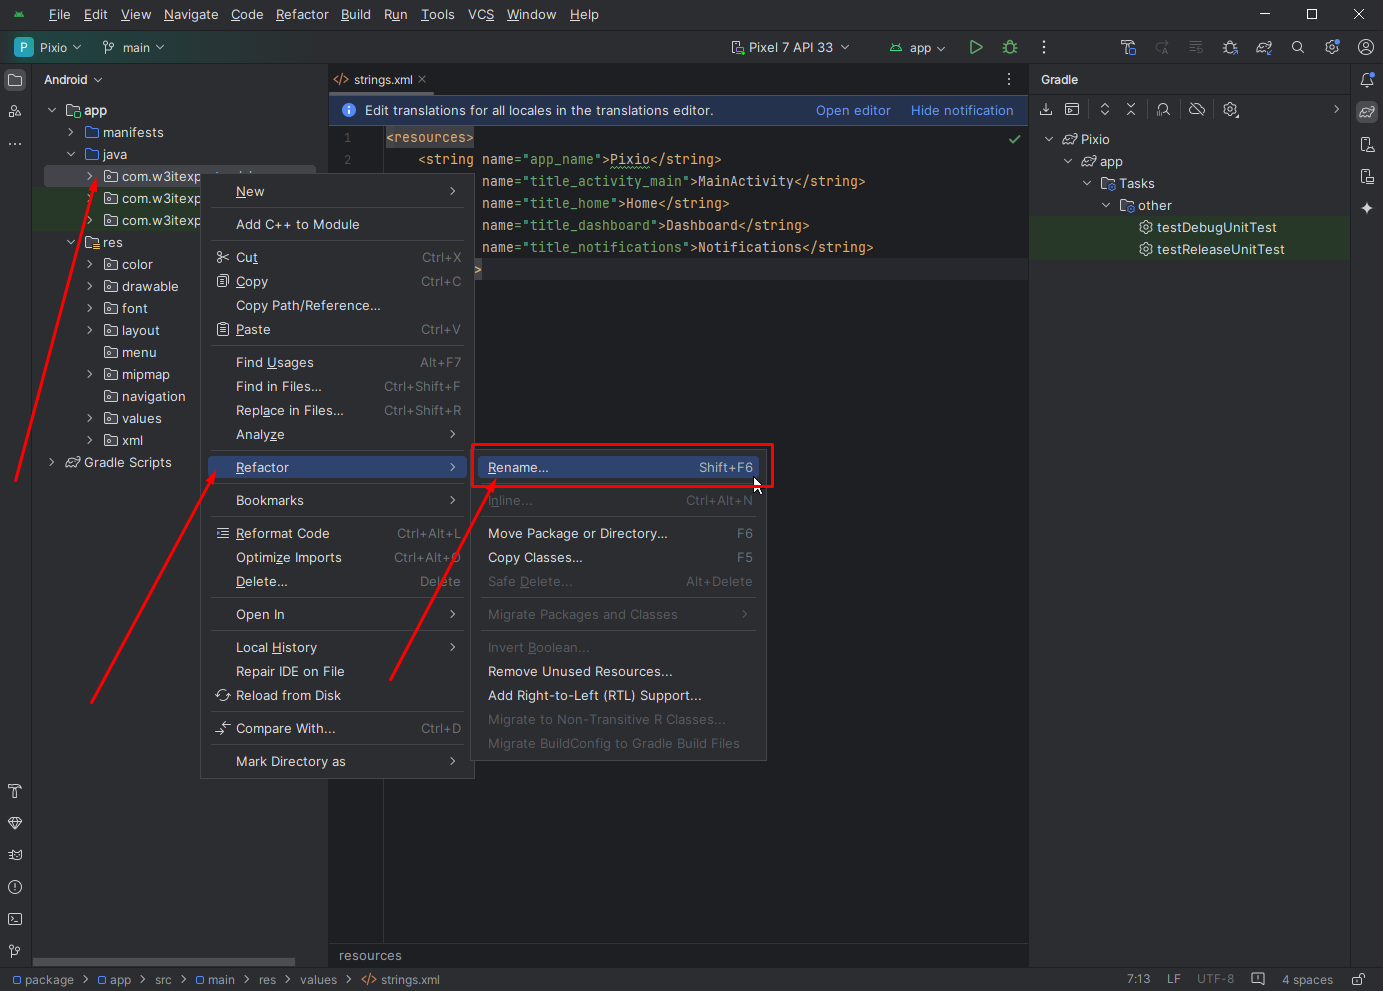
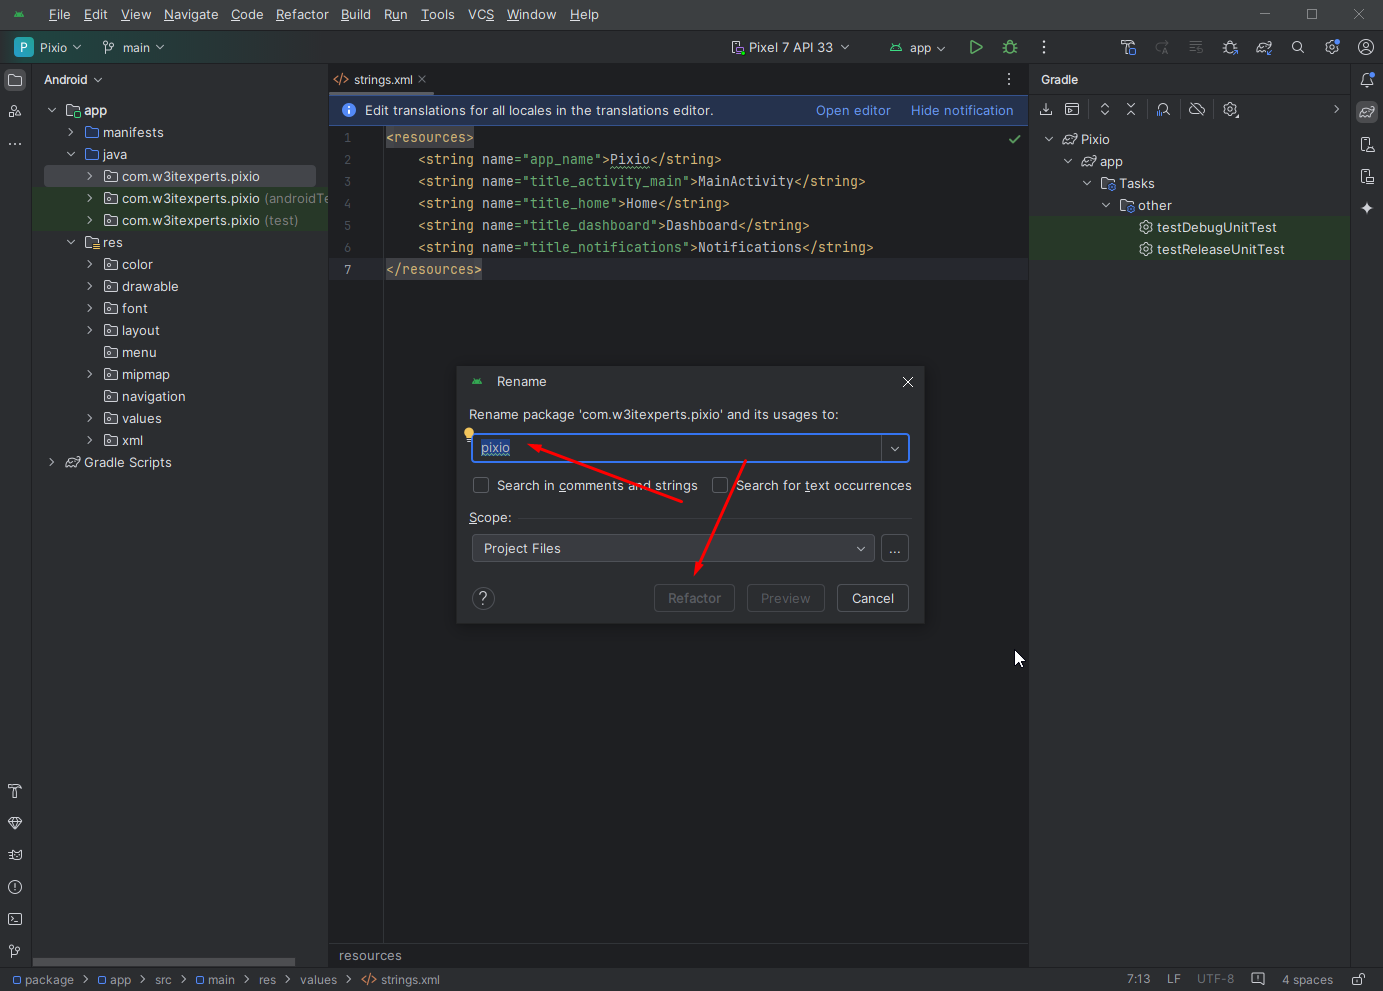
1. Changing the Package Name
To change the package name, follow these steps:
- In Android Studio, right-click on the package name in the
javadirectory and select Refactor > Rename. - Update the package name in the
AndroidManifest.xmlfile located inapp/src/main. - Update the package name in the
build.gradlefile located inappdirectory.
Do You Need Help To Customization
After Purchase A Template...
You Will Start Customizing According Your Requirement
BUT What If You Don't Know
SOLUTION IS HIRE DexignZone
Hire Same Team For Quality Customization
- We Will Customize Template According To Your Requirement
- We Will Upload On Server And Make Sure Your Website is Live